Big M LOVES to craft, and more and more often, wants to do every part of it herself. This includes using scissors. I first introduced her to scissors about a year ago, and it lead to more frustration than fun. However, over the last 12 months, with the help of preschool and this series of activities to introduce scissor skills and teach scissor safety, she has come a long way!
Sharpening Scissor Skills
So believe it or not, teaching kids proper scissor technique begins with activities that do not involve scissors at all. Instead, first focus on strengthening hand muscles, fine motor skills and eye-hand coordination more broadly. This will ease frustrations and naturally improve safety when you do finally put a real pair of scissors in their little hands! And you can start these activities in early toddlerhood, long before you may feel comfortable giving your child a pair of scissors.
Fine Motor Skill Activities
There are hundreds of different activities out there to develop fine motor skills. I’ve shared links to a few of my favorites below, and you can find countless more on my Pinterest board, Fine Motor Skills!.
Follow Meghan @ PlaygroundParkbench’s board Fine Motor Skills on Pinterest.
Mixing Play Dough
The kneading and squishing together of two different colors of play dough can be great fun for kids. Teach them a little color magic, while also strengthening their fingers and hand muscles.
Color Magic with Mouse Paint and Play Dough


Beading Pipe Cleaners
Stringing beads onto stiff pipe cleaners is an excellent challenge for fine motor skills and eye hand coordination. It also teaches them how to hold a pipe cleaner still in one hand, while using the other hand to add beads – a skill that will transfer to holding paper while cutting.
Beaded Bendable Shapes


Using Eye Droppers
The pinch and release motion to manipulate an eye dropper is a great fine motor skill activity. You can use it to make a little science magic adding colored vinegar to a tray of baking soda, to drop paint onto shaving cream to make marbleized prints, or melt a heart frozen in ice!
Melt a Frozen Heart

Adding Paper and Punches
When your child’s fine motor skills seem well developed, you can start to add activities with paper and paper punches that start to mimic the motions and coordination they will require to eventually use scissors.
Tearing
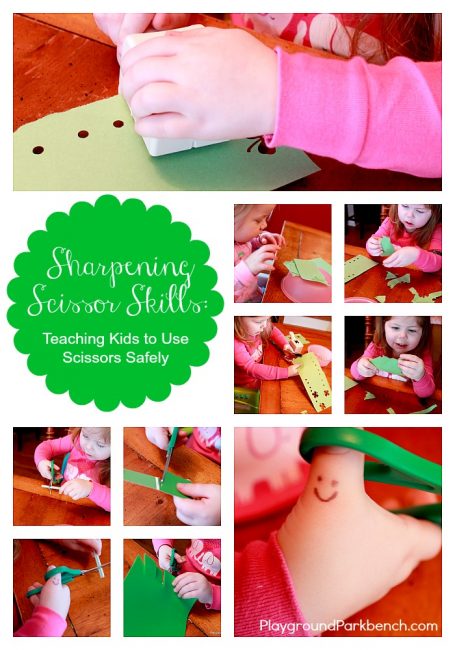
Start with tearing paper. Gripping the paper with both hands between their thumb and fingers and pulling in opposite directions is a first step towards eventually learning to hold the paper and cut it. At 19 months, Lil’ M was more interested in stacking the paper on top of the bowl after I tore it, than tearing it herself… but it kept her occupied while Big M tore and then punched away!


Paper Punches
Paper punches, especially handheld single hole punches, are a smart next step towards cutting paper. Your child has to learn to hold and manipulate the paper while squeezing and releasing the handles of the punch, yet their fingers are still safe from getting snipped. And since it’s March, Big M also wanted to punch out shamrocks!


Introducing Scissors
Once you feel comfortable with the way your child handles the punches and paper, and more importantly, follows directions and is not easily frustrated, you can introduce scissors. It is important they be open to following instructions, accepting help (sometimes the independence and stubborn streak can be vicious!), and if they get frustrated, do not do so aggressively for their own safety.
Recommended Scissors
You want to get your child a good pair of children’s sized scissors. They should cut well, to alleviate the potential for frustration, and have blunt, rounded tips for safety. I recommend Fiskars Childrens Safety Scissors. They are high quality, while still very affordable ($3), and are often the brand used in schools, so they will be familiar to your child when they get there.

Do you see the happy face?
When I first started working with Big M with scissors, my mom gave me a great tip – draw a smiley face on her thumb. Tell her you have to be able to see the smiley face while she is cutting. This forces proper scissor grasp. Often, children have a strong tendency to want to put their thumb on the underside of the scissors while cutting. Drawing the smiley face is a good point of focus both for keeping their thumb on top, and to keep the thumb in the small hole of the handle. When she turns her hand over, I just have to remind to show me her smiley face, and she corrects herself.

Start by Snipping
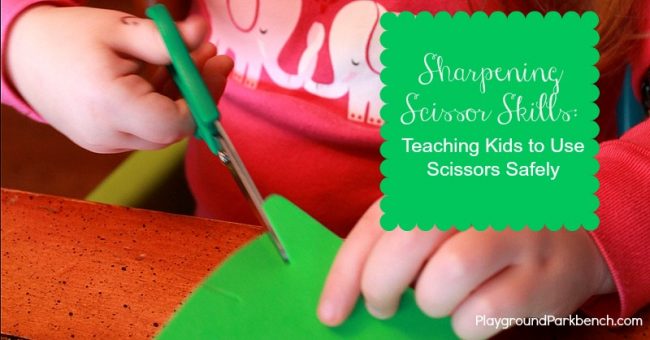
To get them comfortable opening and closing the scissors, practice small snips first. It’s easiest to practice this on objects that will hold firm and stiff while they cut before trying on paper. Practice with things like lengths of play dough, plastic drinking straws, narrow strips of card stock, or paint chip strips.


Make Fringe
Once they master snipping, you can have them snip across a piece of paper repeatedly to make fringe. For a stiffer material, try using craft foam sheets. It is easy enough to cut through while being firmer than regular paper, making it easier for little hands to hold it firmly in place for cutting.


You can practice these skills in a progression in one sitting, on incorporate them into other craft activities, making it part of the fun. Big M called it quits after the fringe today because she wanted to put all these green clippings to good use! Come back Thursday to see our green craft reveal… After your child is comfortable making short, quick single cuts, you can challenge their scissor skills further by having them cut straight lines, zig zag paths, and eventually curves and more complicated shapes.
At what age did you introduce scissors with your child? What other fun materials does your child like to cut?
14 comments
[…] Sharpening Scissor Skills from Playground Parkbench […]
[…] some fun creations you have made with pony beads? If you enjoyed this post, you might also enjoy Scissor Skills for Preschoolers and Weaving Word Webs. For more fine motor skill fun, check out our Fine Motor Skills board on […]
[…] Scissor Skill Practice Using Paint Chips – Play Ground Park Bench […]
[…] As I mentioned last week, Big M and I have been reading Charlotte’s Web at bedtime, inspiring many of our daytime activities, or ‘projects’ as she likes to call them. Our next Charlotte’s Web Words project channeled our inner Templeton, as we worked on not only word formation, but also scissor skills. […]
[…] holder of choice. I used a card as a template to trace on the paper towel. And since Big M is all about scissors these days, I let her cut them out. You want to use a double or triple thickness of paper towel, […]
These are all such great tips. Thanks for sharing!
[…] 1/3 of the plate on the orange construction paper to make the bangs. Big M was more than eager to practice her scissor skills, so I drew lines on the orange paper to let her cut the fringe for the bangs. While she was busy […]
[…] I headed to my craft closet to assess available materials. Fortunately, I had already planned on our scissor skills activity that morning, with a green theme, since it is the month of St. Patrick’s Day! A recent trip […]
Great tips thanks!
sissors are surprisingly hard for little ones to get to grips with. Some lovely ideas to help here. #Pintorials
They are great activities! Totally love it! Thank you for sharing it with us! #pintorials
Glad you like them – thank you for stopping by, and we look forward to sharing at #pintorials again soon!
Fantastic ideas! Thanks for sharing! I love the smiling face on the thumb too, that’s a great reminder to keep their hands in the right position. It’s fun to see your kids working hard…look at that concentration! 🙂
Thanks, Nicole! I love their little concentration faces too – they are such good little model participants… and it cracks me up how Lil’ M gets so involved now too. Big M is now my photo shoot director as well: “Take a picture of this one, Mama!”