I recently received an amazing set of books from Hands-On-Prints. Stay tuned for my full review next week, but one of the books immediately became Big M’s favorite. Around the World from A to Z, by Christinia Cheung and Han Tran, is a beautifully illustrated alphabet book. Inspired by Montessori principles, each letter of the alphabet depicts an activity being performed in front of an iconic world landmark. The opposing page features a textured cursive letter that your child can trace for tactile reinforcement. While cursive handwriting is a key tenet of Montessori instruction, Big M is unfamiliar with them, and had a hard time making out what some of the letters were. She did, however, love tracing over the texture, so we decided to create our own Tactile Alphabet Cards. Be sure to grab your set of printable tactile alphabet cards at the end of this post!

DIY Tactile Alphabet Cards
The tactile experience of tracing sandpaper letters stimulates brain activity in young children. Tracing the textured letter with their finger helps cement the gesture necessary to form the letter internally. To make your own, you only need a few basic supplies.
Supplies
DIY Tactile Alphabet Cards printable
White Cardstock
Elmer’s Glue
Water
Small Cup
Paintbrush
Texture material – sand, glitter, salt, sugar, etc.
Tray (for easy clean-up)


Cost: Free – Less than $5
Prep-Time: Less than 15 minutes
Clean-Up Time: Less than 15 minutes
Grab your set of printable cards at the end of this post!
Making the Cards
I printed three sets of our DIY Tactile Alphabet Cards. I printed them on heavy cardstock, to withstand the glue, texture and ultimately, repeated use. You can use regular paper, but they won’t last as long. I cut up two of the sets, making one letter per card. The printable also includes some lined pages which I have left blank. You can use these to practice writing their name, sight words, or anything else you or your child may choose. I had the cards ready to go post-quiet time.
Collecting our Texture
Since we live down the street from the beach, we took a little adventure walk to collect our texture of choice: sand!

Adding the Texture
I set up two craft stations, one for me and one for Big M, with the bucket of sand in between us to share. We each had our stack of cards, a small cup of watered down Elmer’s glue, a paintbrush and a foil tray. I created a watered down glue mixture of 1 part water, 1 part glue in a small cup to make it easier to paint on to the letters, and it dries faster.
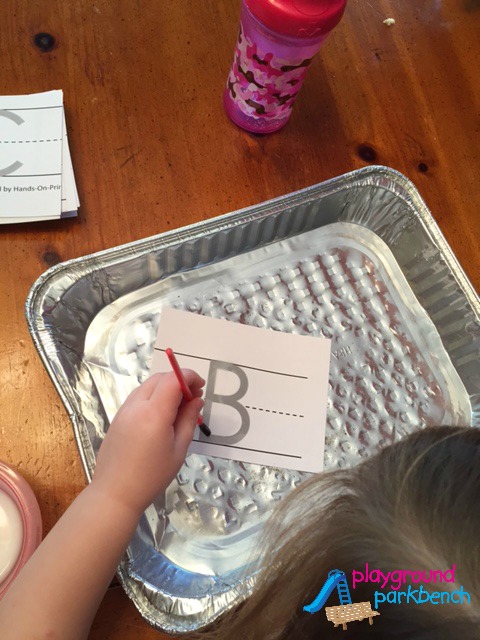
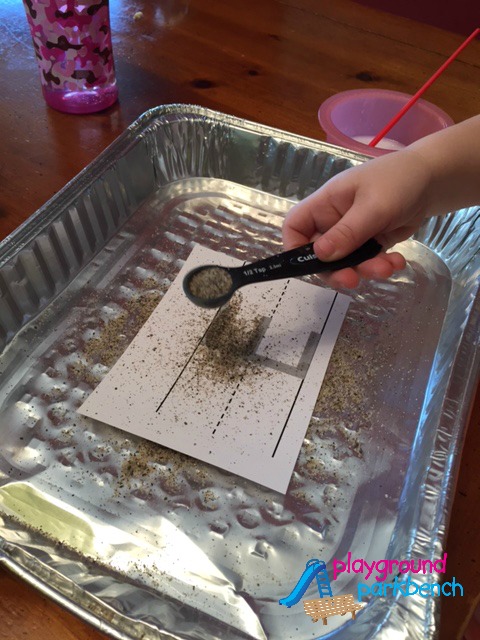
I showed Big M how to paint the glue onto the letter, then using a teaspoon, shake sand over the glue, and finally, shake off the excess sand to make each tactile letter card.
I decided to make a set too, since I wasn’t sure how many she would complete or how great hers would turn out. I was shocked when she completed the entire set, both upper case and lower case letters, and then wanted to do more!

The hardest part for her was actually shaking the sand – my anti-mess maker, she struggled to shake it enough to get it off the spoon but not so hard it went outside the tray. She kept saying, “It’s harder than it looks, Mama!”, one of my favorite quotes from her these days!
Putting the Cards to Work
I let the cards dry, then gathered them for storage in a gallon-sized Ziploc. While we shook off the excess sand, a little continues to fall off, so the bag is good to keep them from leaving trickles of sand everywhere. We took them outside the next day on a beautiful morning, to put them into practice.
 Have your child trace the textured letter with their finger, then recreate it in a tray of sand.

Use Your Tactile Alphabet Cards Printable in Multiple Ways!
I printed three sets of cards, and only cut up two. The third set I put in sheet protectors


I didn’t even know Crayola made these, until I saw them at Staples last week. They are great – washable, and they don’t have the nasty fumes most dry erase markers do. Now, Big M can practice her letter formation at her leisure whenever she likes.
Download Your Printable Tactile Alphabet Cards
Ready to make a set of your own? Add them to your cart below, then complete the checkout process (no charge) to instantly download and print your own set. Please note, this is a virtual product for download only. No cards will be mailed to you.
With these DIY Tactile Alphabet Cards, Big M experienced letter formation in a multitude of ways: first, making the cards, she painted over the letter shapes with glue. Then, in using the cards, she traced the textured letters with her finger and re-created the shapes in a sand tray. And finally, I printed off an extra set that she can use to practice letter formation at her leisure.
If you enjoyed this post, you might like our DIY ABC Bottle, including 8 ways to use it for letter recognition and early literacy. Be sure to also check out our latest eBook, ABCs and 123s, featuring 40+ hands on, play-based learning activities featuring letters and numbers for your preschooler!

9 comments
[…] How enjoyable is it to study alphabets with sensory play? DIY tactile alphabet playing cards are a lot enjoyable from Playground Park Bench. […]
[…] sensory play fun, be sure to check out Ocean Ice Sensory Play, Summer Sorting with Seashells and DIY Tactile Alphabet Cards. You can find all our favorite STEM fun on our STEM for Kids boards on Pinterest: STEM for Girls, […]
[…] DIY Tactile Alphabet Cards – Playground Parkbench […]
[…] DIY Tactile Alphabet Cards – Playground Parkbench […]
[…] numbers 1-30. I put our pages in a notebook with plastic sheet protectors, like we used with our Alphabet Cards because I know Big M likes to revisit activities. She used Crayola Dry Erase Markers to write […]
[…] DIY Tactile Alphabet Cards […]
[…] DIY Tactile Alphabet Cards […]
What a great idea!! Thanks for linking up to the Preschool and Kindergarten Community Post.
[…] letters were unfamiliar to her. She enjoyed tracing the letters in the book so much though, we made our own tactile alphabet cards to play […]